FREE SHIPPING AT $150

ONLY $150.00 AWAY FROM FREE SHIPPING!

YOU'VE EARNED FREE SHIPPING!

0

Your Cart is Empty

June 05, 2023 11 min read

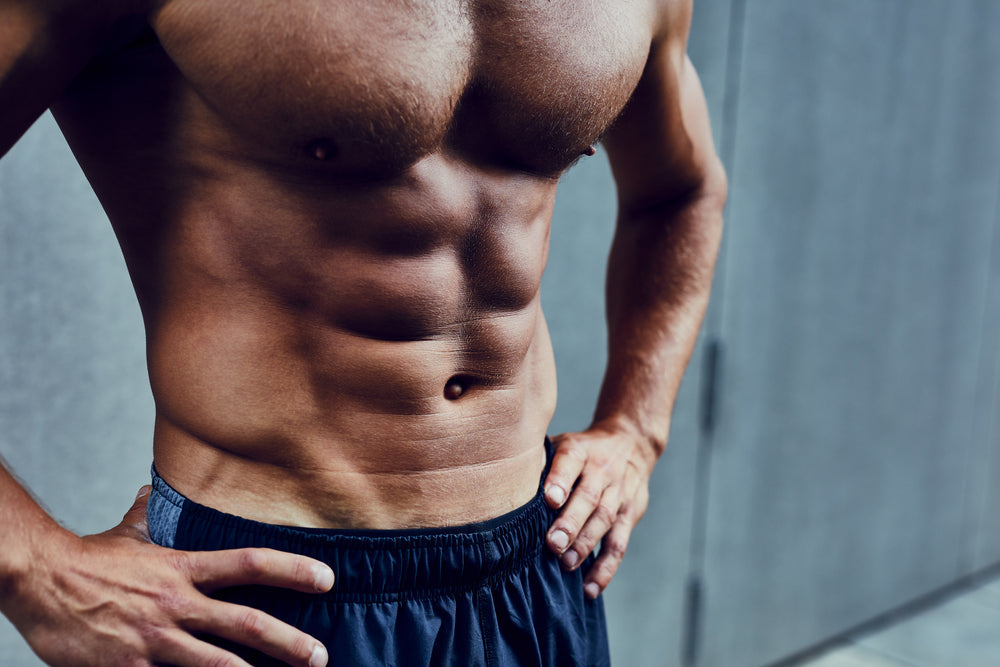
Getting V-line abs, also known as a V-cut or Adonis belt, requires a combination of proper diet, targeted lower ab exercises, and overall body fat reduction.

It won't happen overnight, but consistency and core training 2 or 3 times a week can help you show off your V-line abs within 4 to 8 weeks.

However, to show off your abs and obliques, you need to lose belly fat.

So if your diet isn't in check, you'll never see your abs even if you strengthen your core.

In this article, we’ll give you step-by-step instructions for 10 core exercises to target the muscles that will ultimately give you a head-turning V-cut. Training the core can also help to protect against lower back pain, and back injuries, and even increase your respiratory function.

Which Muscles to Target in Your Workout Routine

To design an ab workout routine, you'll have to understand the anatomy of your core muscles. This is because you need to target specific muscles to get V-Line abs. Below is a list of the seven primary muscle groups on which you should focus.

1. Hip Flexors

The hip flexors are a group of muscles located in the front of the hip and upper thigh area. They include the iliopsoas, which is a combination of the psoas major and iliacus muscles, as well as the rectus femoris muscle (one of the quadriceps muscles) and the sartorius muscle.

The primary function of hip flexors is to flex or bend the hip joint, bringing the thigh closer to the torso. They also play a role in stabilizing the pelvis during activities such as walking, running, and sitting.

2. Rectus Abdominis

The rectus abdominis is a paired muscle located in the front of the abdomen. It is commonly referred to as the “six-pack” muscle due to its segmented appearance. The rectus abdominis runs vertically from the pubic bone to the lower ribs, and its primary function is to flex the trunk.

While the rectus abdominis is known for its aesthetic appeal, it also has functional importance in trunk movement, core stability, and breathing mechanics.

3. External Obliques

The external obliques are a pair of muscles located on the sides and the front of the abdomen. They are the outermost abdominal muscles and have a diagonal orientation. The external obliques assist in twisting and bending the torso to the side.

Overall, the external obliques are crucial for trunk movements, core stability, and assisting in various respiratory functions.

4. Internal Obliques

The internal obliques are a pair of muscles located in the abdominal region. They lie beneath the external obliques and have a diagonal orientation opposite to them. The internal obliques are situated on the sides of the abdomen, starting from the lower ribs and extending down to the pelvis.

Overall, the internal obliques play a vital role in trunk rotation, lateral flexion, core stability, and respiratory functions.

5. Transverse Abdominis

The transverse abdominis is a deep muscle located in the abdominal area. It is the innermost layer of the abdominal muscles and wraps around the torso like a corset. The transverse abdominis runs horizontally across the abdomen, extending from the lower ribs to the pelvis.

The transverse abdominis is essential for core stability, spinal support, breathing, and pelvic floor function. It is often targeted in exercises aimed at improving core strength and stability.

6. Erector Spinae

The erector spinae muscles are a group of muscles that run vertically along the spine on either side. They are located deep in the back, on both sides of the vertebral column. Overall, the erector spinae muscles are crucial for maintaining posture, extending the back, providing spinal stability, and assisting in trunk movement.

They are actively engaged in various activities involving the spine and contribute to overall back strength and function.

7. Quadratus lumborum

The Quadratus lumborum is a paired muscle located in the lower back on both sides of the lumbar spine. It spans from the iliac crest (top of the pelvic bone) to the lower ribs. The Quadratus lumborum is a deep muscle that lies beneath other back muscles.

Overall, the Quadratus lumborum plays an important role in lateral flexion, hip hiking, spinal stabilization, postural control, and breathing assistance. It helps with movements and functions related to the lower back, pelvis, and trunk.

10 Core Exercises for V-Line Abs

It is important to do warm-up exercises before starting your workout routine. These ab exercises hit the core as a whole and target the oblique muscles to build ripped abs. Make sure to maintain a correct posture and engage your core throughout your exercise.

Beginners might want to reach out to a personal trainer to help design a workout routine and help them with the correct posture during execution. Even basic moves like sit-ups and incorrect push-up positions can cause injuries if not performed correctly.

Key points to remember throughout:

  1. Keep your movements controlled and avoid rushing through the exercise.

  2. Breathe continuously and rhythmically throughout the movement.

  3. Start with a number of reps or a time duration that is challenging but manageable for your fitness level. Gradually increase the intensity or duration as you get stronger and more comfortable with the exercises.

1. Bird Dog with Knee/Elbow Touches

The Bird Dog exercise with knee/elbow touches is a variation of the traditional Bird Dog exercise that adds another movement to further engage the core and stability muscles.

Starting Position:

Start on all fours with your hands directly under your shoulders and your knees under your hips. Focus on maintaining a stable and neutral spine throughout the exercise.

Here’s how to do it:

  1. Engage your core muscles by drawing your belly button towards your spine to stabilize your torso and prevent excessive movement.

  2. Extend your right arm straight in front of you, parallel to the ground, while simultaneously extending your left leg straight back behind you, parallel to the ground. Keep your hips and shoulders level.

  3. Slowly bring your right knee and left elbow towards each other in a controlled manner, allowing them to touch or come close together under your torso.

  4. Extend your right arm and left leg back out to the starting position, keeping them straight and parallel to the ground.

  5. Repeat the movement on the opposite side by extending your left arm and right leg, then bringing your left knee and right elbow towards each other.

  6. Continue alternating sides for the desired number of repetitions or times.

2. Superman

The Superman exercise is a bodyweight exercise that targets the muscles in your back, particularly the erector spinae along with other core muscles. Avoid straining your neck by keeping it in line with your spine throughout the exercise.

Starting Position:

Lie face-down on a mat or the floor with your legs straight and arms extended overhead.

Here’s how to do it:

  1. Engage your core muscles by drawing your belly button towards your spine.

  2. Inhale and simultaneously lift your arms, chest, and legs off the ground. Imagine lengthening your body as you lift, aiming for a slight arch in your back. Focus on using your back muscles to lift your limbs rather than relying on momentum.

  3. Keep your gaze toward the floor to maintain a neutral neck position.

  4. Hold the lifted position for a brief moment, focusing on squeezing your back muscles.

  5. Exhale and slowly lower your arms, chest, and legs back down to the starting position.

3. Windshield Wipers

The Windshield Wiper exercise is a challenging core exercise that targets the oblique muscles. Keep your upper body stable throughout the exercise, avoiding excessive movement or twisting of the torso.

Starting Position:

Lie on your back with your arms extended straight out to the sides, forming a “T” shape, palms facing down.

Here’s how to do it:

  1. Lift your legs off the ground, bending your knees at a 90-degree angle. Your thighs should be perpendicular to the floor, and your lower legs should be parallel to the floor.

  2. Engage your core muscles by drawing your belly button towards your spine.

  3. Slowly lower your legs to one side, aiming to touch the floor with your knees while keeping your upper body stable and your shoulder blades pressed into the ground. Focus on using your oblique muscles to control the movement of your legs.

  4. Pause briefly at the lowest point and then lift your legs back up to the starting position.

  5. Repeat the movement on the opposite side by lowering your legs to the other side.

  6. Continue alternating sides for the desired number of repetitions.

4. Side Plank

The Side Plank exercise is an effective core-strengthening exercise that targets the oblique muscles and the muscles that stabilize the spine.

Starting Position:

Start by lying on your side on a mat or the floor. Place your forearm on the ground, perpendicular to your body, with your elbow directly below your shoulder.

Stack your feet on top of each other, ensuring your body forms a straight line from your head to your heels. You can also modify the exercise by placing your lower knee on the ground for added stability.

Here’s how to do it:

  1. Engage your core muscles by drawing your belly button towards your spine.

  2. Lift your hips off the ground, maintaining a straight line from your head to your heels. Your weight should be supported by your forearm and the side of your lower foot. Avoid sagging or arching of the hips.

  3. Keep your neck aligned with your spine, looking straight ahead or slightly upward.

  4. Hold the position for a desired amount of time, aiming for good form and stability. Start with 10–20 seconds and gradually increase as you get stronger.

  5. Lower your hips back down to the ground and switch to the other side to work the opposite oblique muscles.

5. Side V-Ups

The Side V-Up exercise is a challenging core exercise that targets the oblique muscles and helps improve core strength and stability. Throughout the movement, focus on using your oblique muscles to lift your legs and upper body.

Starting Position:

Start by lying on your side on a mat or the floor. Extend your bottom arm straight out in front of you, perpendicular to your body, with your palm facing down. Place your top hand behind your head, supporting the weight of your head.

Here’s how to do it:

  1. Engage your core muscles by drawing your belly button towards your spine.

  2. Simultaneously lift your legs and upper body off the ground, bringing them towards each other, aiming to touch your top elbow to your top knee. Your upper body should twist and rotate towards your knees.

  3. Keep your neck aligned with your spine, avoiding excessive strain or pulling on your head.

  4. Hold the contracted position for a moment, feeling the contraction in your obliques and other ab muscles.

  5. Slowly lower your legs and upper body back down to the starting position.

  6. Repeat the movement for the desired number of repetitions on one side, and then switch to the other side.

6. V-Sit Hold

The V-Sit Hold exercise targets the abdominal muscles and helps improve core strength and stability. Focus on keeping your chest lifted and your back straight, avoiding rounding the spine throughout this exercise, and flexing the hips and not the midsection.

Starting Position:

Start by lying on your back on a mat or the floor with your legs extended and your arms by your sides Keep your feet together and your toes pointed.

Here’s how to do it:

  1. Engage your core muscles by drawing your belly button towards your spine.

  2. Use your core strength to simultaneously lift your legs and upper body off the ground, bringing your chest towards your thighs. Reach your arms forward and extend them parallel to the floor.

  3. Maintain a V-shape position at about a 45-degree angle.

  4. Hold the position for a desired amount of time, aiming for good form and stability. Start with 10–30 seconds and gradually increase as you get stronger.

  5. Slowly lower your upper body and legs back down to the starting position.

7. Mountain Climbers

As an explosive bodyweight exercise, mountain climbers strengthen your abs, and lower body, while giving you a decent cardio workout simultaneously.

Starting Position:

Start in a high plank position with your hands directly under your shoulders and your body in a straight line from head to heels. Your feet should be hip-width apart.

Here’s how to do it:

  1. Engage your core muscles by drawing your belly button towards your spine.

  2. Begin by lifting your right foot off the ground and driving your right knee towards your chest, keeping your foot flexed.

  3. Maintain a straight line from head to heels, avoiding sagging or arching of the lower back or pushing your butt up.

  4. As you bring your right knee in, simultaneously extend your left leg back behind you, keeping it straight and in line with your body.

  5. Quickly switch legs, bringing your left knee towards your chest while extending your right leg back.

  6. Continue alternating legs in a dynamic and controlled manner, as if you are running in place horizontally instead of straight up.

  7. Maintain a steady and controlled rhythm, keeping your core engaged and your body stable throughout the movement.

8. Plank Shoulder Taps

The Plank Shoulder Taps exercise is a core-strengthening exercise that also engages the shoulder and stabilizes core muscles.

Starting Position:

Start in a high plank position with your hands directly under your shoulders and your body in a straight line from head to heels. Your feet should be hip-width apart.

Here’s how to do it:

  1. Engage your core muscles by drawing your belly button towards your spine.

  1. Maintain a stable and controlled plank position with a straight line from head to heels, avoiding sagging or arching of the lower back throughout,

  2. Lift your right hand off the ground and tap the left shoulder. Avoid rotating or shifting your body as you tap.

  3. Return your hand to the starting position and repeat on the opposite side, lifting the other hand to tap the opposite shoulder.

  4. Continue alternating sides, tapping each shoulder, while keeping your core engaged and your body stable.

  5. Maintain a steady and controlled rhythm, focusing on stability and control rather than speed.

9. Lying Leg Raises

The Lying Leg Raise or leg lifts exercise targets the lower abdominal muscles and hip flexors.

Starting Position:

Lie flat on your back on a mat or the floor with your legs extended.

Place your hands either under your glutes for support or alongside your body for stability. Keep your lower back pressed into the mat or floor to maintain proper form and avoid excessive arching.

Here’s how to do it:

  1. Engage your core muscles by drawing your belly button towards your spine.

  2. Keeping your legs straight, slowly lift them off the ground, raising them towards the ceiling. Focus on using your lower abdominal muscles to initiate the movement.

  3. Continue lifting your legs until they are perpendicular to the ground or until you feel a stretch in your lower abs. Make sure to maintain control throughout the movement.

  4. Hold the position briefly, squeezing your lower abs.

  5. Slowly lower your legs back down to the starting position, keeping them straight and controlled.

  6. Repeat the movement for the desired number of repetitions.

10. Bicycle Crunch

The Bicycle Crunch exercise is an effective core exercise that targets the abdominal muscles, particularly the obliques.

Starting Position:

Start by lying flat on your back on a mat or the floor. Place your hands lightly behind your head, supporting the weight of your head without pulling on your neck. Keep your lower back pressed into the mat or floor to maintain proper form and avoid excessive arching.

Here’s how to do it:

  1. Bend your knees and lift your feet off the ground, bringing your thighs towards your chest. Your lower legs should be parallel to the floor, and your knees should be at a 90-degree angle.

  2. Engage your core muscles by drawing your belly button towards your spine.

  3. Lift your head, shoulders, and upper back off the ground, keeping your gaze forward.

  4. Begin the movement by extending your right leg out straight while simultaneously twisting your upper body and bringing your left elbow towards your right knee. Your right leg should be hovering above the ground.

  5. Return to the starting position and repeat on the other side, extending your left leg out straight while bringing your right elbow towards your left knee.

  6. Continue alternating sides in a fluid and controlled motion, mimicking a pedaling motion.

  7. Keep your core engaged throughout the exercise and maintain a steady breathing pattern.

Whether you are a beginner or experienced in bodybuilding or strength training, it's important to listen to your body and stop if you experience pain or discomfort. If you have any back pain concerns or health conditions, consult a healthcare professional or certified trainer before attempting new exercises in your quest for six-pack abs.

Final Thoughts

It is clear that abdominal exercises are essential for obtaining V-Line Abs. With the right core workout. properly performed, you can work your way toward a toned, strong core.

However, it is important to remember that achieving V-Cut Abs is not just about exercises – maintaining your body fat percentage by following a healthy diet and adequate rest are equally important for maintaining overall wellness.

Therefore, make sure to take a holistic approach to achieving your desired physique. With dedication and consistency, you will be able to get the V-Line Abs that you've always wanted.

If you're looking to accelerate the process, consider adding Shredded-AF to your daily routine.

SHREDDED-AF is an advanced multistage thermogenic that focuses on boosting metabolism, suppressing cravings, and providing all-day energy and mental clarity without the crash, and you can learn more about the science behind it from Dr. Paul Henning here.