Sales Popup
Someone purchased a
6 hours ago

FREE SHIPPING AT $150

ONLY $150.00 AWAY FROM FREE SHIPPING!

YOU'VE EARNED FREE SHIPPING!

0

Your Cart is Empty

October 09, 2020 10 min read

Getting shredded is all well and good, but at the end of the day, it’s going to be a strong and healthy base that dictates your fitness. What base might we be talking about? The pelvis; connector of your thighs, abdominals, and the back.

Whenever this important part of our bodies is thrown out of balance, things start to go bad—sometimes very bad. The problem tends to either be posterior pelvic tilt or anterior pelvic tilt, the latter of which we’ll be expanding on below.

While possibly leading to several problems, anterior pelvic tilt can be alleviated and even fixed with a steady commitment to including the proper stretches and strength training into your daily routine.

How to Know if You have Anterior Pelvic Tilt 

Anterior pelvic tilt (or APT for short) is a postural misalignment when the pelvis is rotated, or tilted, forwards and down. If looking from the side, this looks like the front of your pelvis being significantly lower than the back of your pelvis. While a slight anterior tilt is common (up to 10%), an exaggerated one is cause for concern. 

One way to test whether you have APT is doing the Thomas Test; commonly used with gymnasts and dancers.

To perform the Thomas test:

1. Find a table and sit on the edge of it, with your legs hanging off.

2. Laying back down on the table, make sure that your legs are hanging off the table at the knee.

3. Taking your left leg, pull it in towards you until it touches your chest. Use your hands to pull it in closer.

4. Reverse the movement and repeat with the other leg.

If you passed the Thomas test, the back of your resting leg should have been resting against the table every time you got into position.

However, if you had to either rotate or extend the resting leg for it to touch the table, then that’s a sign you might have anterior pelvic tilt.

A group of people doing leg raises.

The Symptoms of Anterior Pelvic Tilt

If you’re not sure after doing the Thomas test, there are a few symptoms to watch out for if you think you have APT. 

The first and most obvious is low back pain. Since the hips are rotated forward, this leads to the inward curving of the lumbar spine—also known as lordosis. Pain in the groin region can also come with lower back pain.

Another symptom is the tightening of certain muscles. This primarily includes tight hip flexors, hamstrings, and quadriceps. This all leads to postural changes, which can cascade into a series of knee pain, back pain, and hip pain.

The Mechanics Behind Anterior Pelvic Tilt

So, the first step with fixing the problem is finding out what’s actually going on. The issue basically comes down to the tightening of certain muscles and the weakening of others.

The muscles that are tight, or are overactive, are the collection of hip flexor muscles; the psoas, rectus femoris, iliopsoas, and iliacus. The erector spinae muscle group is also affected (the muscles important for stabilizing your spine). 

On the other hand, we have the muscles that have been weakened: primarily the abdominal muscles and the glutes—which includes the gluteus maximus, medias, and minimus. 

Therefore, it follows that a proper alleviation of APT will have some sort of element of stretching to fix the tight muscles, and an element of strength training to beef up the weaker muscles. 

What Might Be Causing Anterior Pelvic Tilt

If you either want to avoid APT or not add fuel to the fire, it’s important to know what causes this condition. 

The primary reason is inactivity, and in particular, sitting too much. It’s not surprising that APT is becoming a bigger and bigger problem in today’s world with a population that’s increasingly stagnate at desk jobs. But while the most common reason, there’s a host of others that it’s good to be aware of.

For one, improper form with both the squat and especially the deadlift can compound the issues of APT, and even cause them. That’s why technique is so important when it comes to your heavy lifts.

Pelvic tilt can also be caused by either imbalanced strength training routines (when there aren’t enough movements targeting the core), and also from imbalances caused by certain sports (such as the aforementioned gymnastics). Lastly, there’s genetics—which opens up a whole can of worms.

How to Fix Anterior Pelvic Tilt

As we mentioned above, part of fixing the issue is going to come down to stretching the muscles that are too tight. That means the hip flexors should be the focus of stretching, rather than the erector spinae. This is because the erector spinae muscle group tends to be a consequence of ATP instead of the cause.

In the hip flexor muscle group, it’s going to be the iliopsoas muscle that should be brought to the forefront of stretching. When it comes to strengthening muscles, it’s going to be glutes and abs that take the limelight. Here’s a basic summary of what’s going to need to happen: 

  • Stretch the tight hip flexors
  • Stretch the quads/thighs
  • Stretch the lower back
  • Strengthen the glutes
  • Strengthen the hamstrings
  • Strengthen the core

Before We Get Started…

While we could get into the nitty-gritty right off the bat, it’s going to be difficult for someone to do these movements properly if they don’t know what a “proper” pelvic angle feels like. 

If you’ve done the Thomas test you already know what it’s supposed to look like, but it’s also important to get used to working with your pelvis to tilt it back and forth. 

This is best done lying face-up on the floor with your knees bent at about a 90-degree angle. If you have APT, there is probably going to be significant space between your lower back and the floor. Initiate the movement by activating your glutes, tilting the pelvis, and then pushing your lower back into the ground.

This position is the posterior pelvic tilt, and it’s useful to get used to it so you can work with the advised stretches and exercises to their greatest benefit. Try going between the two positions for several reps until you get used to moving your pelvis around. 

Releases

While the necessity of releasing the tight muscles before going into the stretches and strength movements will depend on the severity of a person’s APT, it’s a good idea to begin the routine this way nonetheless. 

To release the erector spinae, place a massage ball underneath your lower back and lie down on it. However, make sure to use an OK amount of bodyweight—not too heavy and not too light. Remember not to put the ball directly underneath your spine, but do try to aim for the spots that are the most painful. 

Some bruising might happen the first few times you do this, but don’t worry. Try to keep this release up for about 3 minutes (on each side) before each session.

When it comes to your hip flexors, you’ll want to place a foam roller underneath this muscle group and put your bodyweight overtop. It’ll be helpful to search up where muscles such as the rectus femoris and anterior adductors are, in order to find the correct spot for the foam roller—but it should be around your upper, front thigh region.

Once again, do this for about 3 minutes on each side before every training session.

Stretching the Tight Muscles

There are three main stretches that are recommended, each targeting specific aspects of the muscle groups that are overactive. In terms of equipment, all you need is your bodyweight and some space.

The “Lunge” Psoas Stretch

This stretch is meant to target your psoas muscle on your inner thigh, helping to loosen up your hip flexors.

1. To begin, you’ll want to get into the lunge position—but keep going until your back leg is resting on the floor and your front knee is at a 90-degree angle. Engage your abdominal muscles, as if you’re about to take a punch.

2. Bring your pelvis forward into the posterior pelvic tilt position that we looked at before. Your abdominals and glutes tightening should help you with this.

3. Initiate the hold by leaning forward slightly, moving away from your back leg. You should feel a deeper stretch in the hip flexor of the back leg and your inner thigh.

4. If you want to stretch even deeper (or work your way up to this), then try rotating your torso to the opposite direction of your front leg.

5. Maintain the hold for 30 seconds before switching sides and doing the same.

Over a series of sessions, this should begin loosening up your hip flexors.

The Rectus Femoris Stretch 

The rectus femoris is the other muscle that makes up the hip flexors, and so it’s therefore essential that it’s properly stretched. This muscle is often tighter than the psoas, so take extra care with this stretch.

You can do this stretch either standing or kneeling.

For the standing variation:

1. Stand with your legs together and back straight. Engage your abdominals to help with stability.

2. Lift your ankle up behind you, bending your knee. You can grab onto the back of your foot with your hands to give you some extra tension and support. Your knees should stay in line with one another throughout the entire hold.

3. Once again, drive your pelvis back in order to perform a posterior pelvic tilt. You should feel a deep stretch at the front of your thigh.

4. Hold this position for about 30 seconds and then repeat with the other side. 

The kneeling version can offer more stability if that’s an issue, and with the use of a bench, you can get an even deeper stretch if you’ve got the mobility to spare. This is adjustable by either bringing the bench closer or further away from you.

1. Begin by placing a foot forward and bending both of your knees. The front knee will be at a 90-degree angle.

2. Bring your back foot up once again, either grabbing it with your hands or propping it against a bench or other surface behind you.

3. Engage your abdominals and bring your pelvis into the posterior pelvic tilt position. Once again, you should feel a deep stretch at the front of your thigh.

The Leg Raise with Back Stretch

This is a great movement that combines elements of strengthening and stretching at the same time. Specifically, it’ll aid in abdominal activation while also stretching out your back and glutes.

Similar to a donkey stretch, this is how you perform this movement:

1. Getting down on your hands and knees, plant your hands below you shoulder-width apart. Your knees should be planted below your hips, with your back parallel to the floor.

2. Exhale as you bring your belly button in towards you, arching your back as you do. Hold this position for 2 seconds before reversing the movement.

3. Continue by extending one of your legs behind you. You want to raise it until it’s aligned with the rest of your spine. Your back should maintain a neutral position.

4. Hold for a few seconds before reversing the movement. Repeat for the desired amount of reps and then switch sides.

The Best Strengthening Exercises

Like the stretches above, these will also be bodyweight. When creating a routine to target your APT, make sure to include a variety of exercises that have different focuses. We’ve included some of the best exercises for you to choose from below.

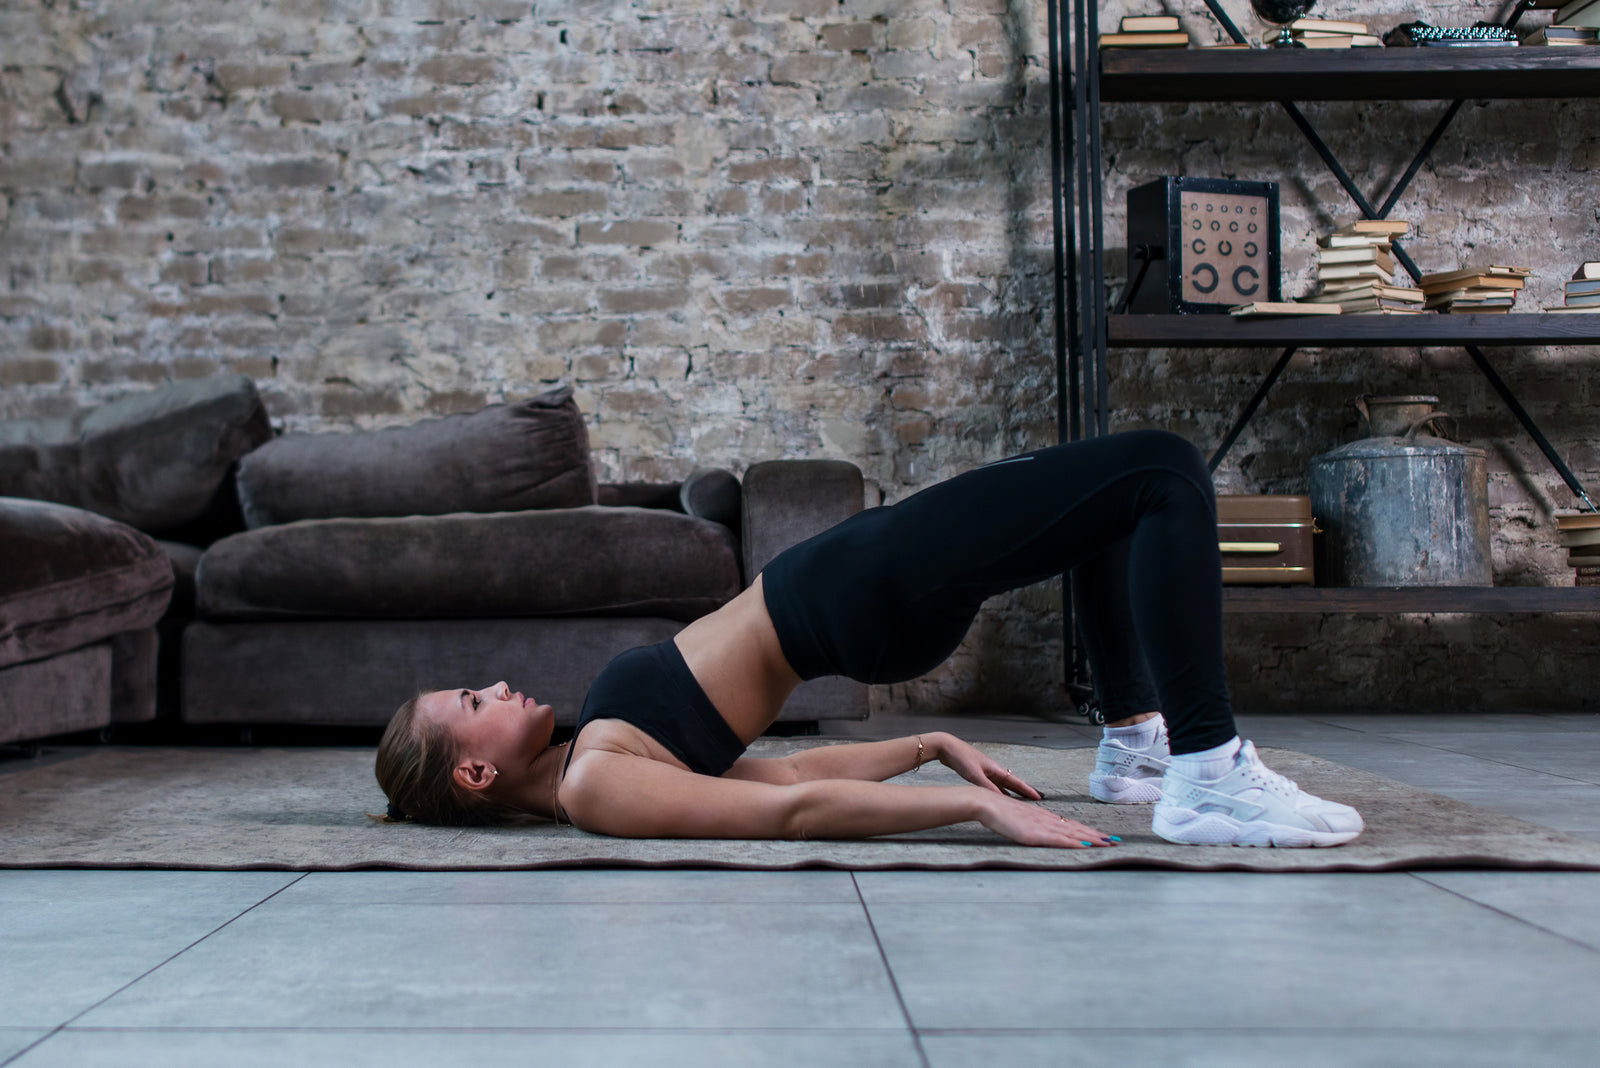
Glute Bridge

As the name suggests, this movement will strengthen your glutes while also engaging your hamstrings—making it the perfect movement to tackle APT.

1. Begin by lying on the floor facing up. Your feet should be flat on the floor and your knees should be bent. Keep your feet planted about hip-width apart, keeping your arms by your sides.

2. Drive through your heels and push them into the ground in order to start the movement. Your core, glutes, and hamstrings should also be engaged throughout.

3. Lifting your pelvis up, it should reach a point where it forms a straight line with your thighs.

4. Hold at the top for about 2 seconds before slowly reversing the movement. Repeat for the desired amount of reps.

Hip Thrusts

While similar to the glute bridge, hip thrusts introduce a wider range of motion due to the fact that your torso is elevated about your feet. It also targets the glutes and can even be done with a weight in your lap if you want to do it loaded.

1. You’ll need a bench for you to place your shoulders on while having your feet planted to the ground in front. Keep your feet about hip-width apart.

2. Once again engaging the glutes and hamstrings, slowly move your torso upwards without moving your shoulder blades.

3. Keep going until your torso is parallel to the floor. Your feet should be placed in a position that allows for your shins to be vertical when the movement is completed.

4. While maintaining the top of the movement for a few seconds, ensure that your lower back isn’t arching at all—meaning, your hips should be in the posterior tilt positioning. This is key if you want to engage the correct muscles.  

Deadbugs

This movement engages your abdominals to a high degree while also being a good hip flexor stretch.  

1. Lying with your back flat on the floor, hold both of your knees bent in the air. Your abdominals should be engaged. Ensure that your back is flattened against the ground throughout the entire exercise.

2. Begin by stretching out your left arm straight out behind you at the same time as you stretch out your right leg straight down. The further you go down the better, but the key is keeping your back flat against the ground.

3. Hold this position for 5 to 10 seconds before reversing the movement. Alternate sides while you’re doing this exercise.

A girl doing RKC planks.

RKC Planks

Although RKC stands for the Russian Kettlebell Challenge, you won’t be using any kettlebells. What you will be doing, however, is engaging all of the conventional plank muscles to a much higher degree.

This works really well for our purposes since it’s those exact muscles we want to be strengthening—namely, the abs and glutes. Its secret comes down to the unique form.

1. Begin from the conventional plank position but bring your hands together and clench. Do this as you pull your shoulders in.

2. By engaging your quads, your knees should rise up slightly. As this happens, you want to activate your glutes.

3. The point here is tension; squeeze your shoulders towards your toes and try squeezing your toes toward your head. It should feel as if you’re trying to go into the pike position.

Commitment is Key

It comes down to avoiding excessive sitting and poor posture while also avoiding weak glutes and weak abdominals, keeping your back muscles in check as well.

But while the above releases, stretches, and corrective exercises might put you well on your way to fixing any anterior tilt issues and muscle imbalances you might have, it’s going to be the daily commitment to the routine that brings home the bacon.

Keeping your eye on the prize and setting goals will be there to motivate you when nothing else will.