FREE SHIPPING AT $150

ONLY $150.00 AWAY FROM FREE SHIPPING!

YOU'VE EARNED FREE SHIPPING!

0

Your Cart is Empty

December 11, 2021 10 min read

The squat is one of the most  functional and fundamental exercises out there.

Dozens of variations exist, all providing similar yet specific benefits to the development of your lower body’s muscles. But since there are so many choices, there’s a lot to sift through.

The box squat is one of these variations of the squat, and it happens to be one of the most versatile and useful—whether you’re new to squatting or a pro that wants to develop their explosive strength. In fact, Louie Simmons from Westside Barbell is a major proponent of this lift.

With the successful incorporation of box squats into your routine, you’ll improve your squat form, increase the development of your glutes and hamstrings, and grow your overall explosive power.

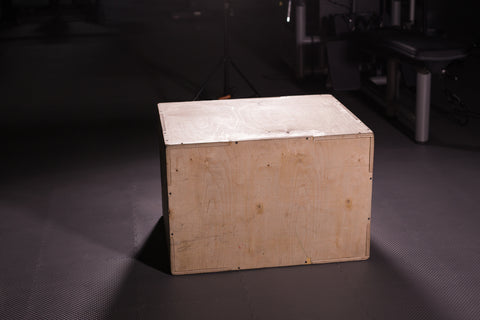
Wooden blocks at the crossfit gym

The Benefits of Box Squats

At first glance, the box squat sounds simple enough. All you do is sit down on a box at the bottom of a squat. However, this introduces some special mechanics that work your legs in different ways than the traditional barbell back squat. With regular squats, you’re always able to use some of the stored elastic tension in your muscles to get yourself out of the hole (the bottom of the lift).

This use of momentum is great if you’re trying to hit a new PR, but not so great if you’re looking to develop the muscles in your legs (since they’re doing less work). The box squat has you come to a standstill, which means that you’re not going to be able to use any stored energy in the stretch reflex to get yourself back up.

This forces you to develop your  force and power in your legs, specifically the posterior chain.

Glutes and Hams

Because the box squat requires a wider stance, you’re going to be using more of the glutes, hamstrings, and hip adductors. On the other hand, the quadriceps will be de-emphasized throughout the lift. This makes the box squat great not only for those looking to develop their explosive leg strength, but also their glutes and hamstrings.

Progressing to Better Squats

Box squats are difficult because of the lack of momentum to help you out, and  they’re a good way to improve your regular squats. They can help beginners learn proper squat form and get people comfortable squatting to the correct depth.

For example, box squats stress the idea that the hips need to hinge before the knees.

Box squats also require your thighs to go at least parallel to the floor, meaning that you’re going to learn a full range of motion. If you want to get the most out of doing box squats, proper form with good squat depth is going to be necessary.

Easier on the Knees

Squats are only bad for the knees if done with improper form or if there’s an underlying issue. However, box squats are much easier on the knees than traditional squats. This makes them a terrific choice for lifters who are injured or are recovering from an injury in this area. Both the wider stance and the hinging at the hips allow for a movement that’s significantly easier on the knees since the load is shifted onto the hips.

How to Box Squat


If this is your first time performing the box squat, it’s best to either do the bodyweight version or perform it with an unloaded barbell. This will get you used to the movement pattern and set you up for success when you move onto heavier weights.

Before you begin the box squat using weight plates, warm up your legs before beginning. Although the box squat is easier on your knees, it’s always a good idea to loosen up and get your blood pumping through your muscles before beginning a lift that requires a lot of exertion.

Once you’ve warmed up and loaded up a barbell on a squat rack, you’re ready to rumble:

  1. Place the box far enough behind you where your thighs will be at least parallel to the floor, and your shins perpendicular to the floor. Your stance should be set wide and your feet should either be pointed straight ahead or slightly turned out. Your knees should also be pushed out—this wide stance will allow for a greater focus to be placed on the muscles of the posterior chain, such as the hips, glutes, hamstrings, and back.
  2. Getting underneath the bar, pull your shoulder blades together and allow the bar to rest on your upper back. Hook your hands around the bar on either side with a wide grip and pull the bar tighter into the traps. Ensure that your elbows aren’t flaring out, but rather pulled in and up. Tighten your core and breathe in, keeping your abdominals as tight as possible throughout the entire movement. This will help to stabilize you and therefore lead to more efficient energy use.
  3. Unrack the bar by lifting you’re your chest up and arching the upper back. Make sure you’re firmly rooted into the floor—think of “spreading” the floor apart with your legs instead of pushing down into it. This will help to engage your hip muscles. This will be your starting position.
  4. The downward phase of the movement begins by hinging at the hips before you hinge at the knees. The key here is to ensure that you’re sitting “back” instead of “down.” If you perform this part by sitting down, your quads are going to dominate over the glutes and hips, which isn’t what you want.
  5. As you near the box, ensure that your chest is kept high and your abdominals are engaged. Your back should be tightly arched and your head looking straight forward as you sit down on the box.
  6. Once you sit down on the box, the only thing that should relax is the hip flexors. The glutes and hamstrings will be stretched and the core kept engaged even as you’re “resting” on the box. Make sure that your shins are either perpendicular to the floor, or even past perpendicular. This will ensure that more of the engagement of the ascent will come from the glutes, hamstrings, hips, and spinal erectors.
  7. Now, you want to explosively reverse the movements. Once again, make sure that your abdominals are kept tight before driving the upper back up into the bar, followed by the spinal erectors, hips, glutes, and hamstrings. The quads will then be engaged in the final part of the lift where you drive your feet out and push yourself into the bar. You want to imagine yourself “jumping” off the box by explosively engaging all of these muscles in sync.
  8. Return to the starting position and repeat for the desired amount of reps.

Programming the Box Squat

If you’re new to box squats or just squatting in general, stick to bodyweight box squats. Do anywhere from 10 to 15 repetitions at a time, with one or two sets during your lower body workouts.

If you’re looking for heavier box squats, there are a few different ways you can approach them  based on your goals. If you’re looking to gain muscle mass through hypertrophy training, you’ll want to stick to a lot of repetitions while decreasing the amount of weight you use.

Three to four sets of 6 to 10 reps should be a good range to aim for, but keep in mind that squats with a full range of motion are going to be more conducive towards muscle growth.

Box squats are all about building explosive power in the legs.

Which means they are ideal for addressing strength needs in the most difficult portion of the squat (known as the sticking point).

And since the range of motion is limited with box squats, you should also be able to use more weight than with regular squats. Aim for lifting 80% to 90% of your 1 rep max over 2 to 5 reps. Continue this for 3 to 5 sets during your lower body workout sessions.

Tips for Perfect Box Squats

The box squat is all about correctly engaging the muscles so that you can get the most out of the exercise. That is, extreme power gains in the lower body that’ll help you continue progression in your conventional squatting. The other major benefit of box squats—that it helps new lifters learn proper squat form—also points to the importance of form in the box squat.

If you’re using improper form in the box squat, that’s going to carry over to when you begin doing regular back squats. That’s why it’s very important to ensure you’re doing everything you can to perform the best box squats you’re able to. 

Set Up for Success

The way you set up will largely depend on what your particular goals are, but there are some general rules to help: 

  1. If your goal is to develop power in the sticking point of your squat, you should be setting yourself up so that the box height puts you just below this sticking point. Typically, this will mean that your thighs should be either parallel or just below parallel to the floor and your shins will be about perpendicular.
  2. However, for athletes that want to train their jump height, setting the box so that your knees bend 60-70 degrees is the best way to go. This will better follow the knee mechanics of a jump and will allow for a more efficient progression in one’s vertical.

In consideration of these things, you’ll both want to pay attention to the height of the box, and how far in front of it you set yourself up.

If it’s your first time box squatting, aim for perpendicular shins and parallel thighs, then tweak the workout so it better suits your individual needs and goals.

Knees and Hips

The key for the descent is keeping your knees in the same position as your hips go back, rather than your knees coming forward. Ultimately, this exercise is all about the posterior chain (the glutes, hamstrings, erector spinae, hips), and so you want to have these muscles take center stage.

If you bend your knees too early in the descent, you’re going to be activating more of your quads which isn’t something you want, since it’ll take away emphasis from the glutes and hips. And on the ascent, you want to reverse the movement completely. Only allow your quads to straighten the knees, but allow the majority of the lift to come from hinging (and unhinging) at the hips.

Taking it Slow

As with all new exercises in your repertoire, take it slow. Not only does this mean first trying the lift with an empty bar (or simply with your body weight), but also by taking the lift itself slow. While the box squat does have an explosive element where you need to drive upward with a lot of strength quickly, you need to allow all of this energy to come from the muscles in question.

This means driving upward from a dead stop rather than rocking your torso forward to give yourself some helpful momentum.

While this will make the lift itself easier, it’s not going to do you any favors when it comes to gains and good squat form. Yes, you should be using explosive power, but that doesn’t mean doing a touch-and-go on the box, or bouncing off of it, or even dropping down. Control the movement in every aspect and your gains in the long term will thank you.

Box Squat Variations

The box squat is a versatile lift that can help you in many different dimensions—whether you’re an amateur or an advanced lifter. A box squat variation can be as simple as changing the height of the box and your distance from it, which allows you to address different portions of the squat movement. Along with changing the height, there are other ways you can make the box squat work for you.

Like we mentioned above, a bodyweight box squat is a good idea for those just getting used to the movement pattern in a squat. It allows you to get the form down well before progressing to a loaded barbell. On the other hand, goblet box squats can be performed by those who don’t have access to a barbell. While you won’t be able to overload your muscles with a dumbbell or kettlebell as much as with a barbell, you’ll still be adding some tension to further develop your strength.

You can also put the bar on your front shoulders instead, making it a front box squat. This variation is used by many Olympic lifters to increase the explosive power in their sticking point with the front squat. The front squat places less of an emphasis on the posterior chain and more of a focus on the quads. This makes it less a “front box squat,” and more of a front squat to a sitting position.

Hatfield Squat


The Hatfield Squat was invented by Frederick C. Hatfield who was also known as “Dr. Squat”.

The Hatfield squat requires a safety squat bar. This allows the bar to sit on your back by itself, while your hands support your body by holding onto the safety rack. With your arms supporting you, they help to improve your balance, keep your torso upright, and make the lift overall easier.

All in all, this variation requires less mobility in the knees, ankles, and hips than the conventional back squat. There’s also less upper back strength and coordination necessary for the lifter to successfully pull off the lift. Not only does this make it a good variation for those recovering from upper back injuries, but also for those working their way up to a regular back squat.

However, the Hatfield squat isn’t just an easier progression to the regular squat. It can also be used to add some added variety into your workouts, also helping to address sticking points. Both the box squat and the Hatfield squat make the squat easier in some sense—either by reducing the range of motion or allowing your hands to help you. By making the movement “easier,” it becomes easier to hone in on specific portions of the squat in order to improve.

Thinking Outside the Box

With a simple tweak on the traditional squat, there’s a wealth of benefits that anyone can reap with the proper training. The box squat is good for beginners trying to learn proper squat mechanics, useful for advanced lifters trying to develop their power output through sticking points, and useful for athletes that want to be able to strengthen their legs and jump higher.

Although it’s a more specialized lift, the box squat has shown to be versatile for different needs and goals, and it’s therefore an extremely useful exercise to include in your training repertoire. The box squat goes to show how fundamental movements can be slightly changed with simple pieces of equipment to change the mechanics and introduce a wealth of benefits for different lifters and their needs.

In many circumstances pertaining to the lower body, the box squat will be the right lift for the job.

However, it’s only going to get you so far without  enough rest and proper nutrition. Account for these three pillars of a successful training program and you’ll be well on your way to a set of stronger, more powerful, tree-trunk legs.